Showing posts with label diys. Show all posts

Sunday, February 16, 2014

Four Years of Cruz Valentine's

Four years of Valentine's from Cruz Man...

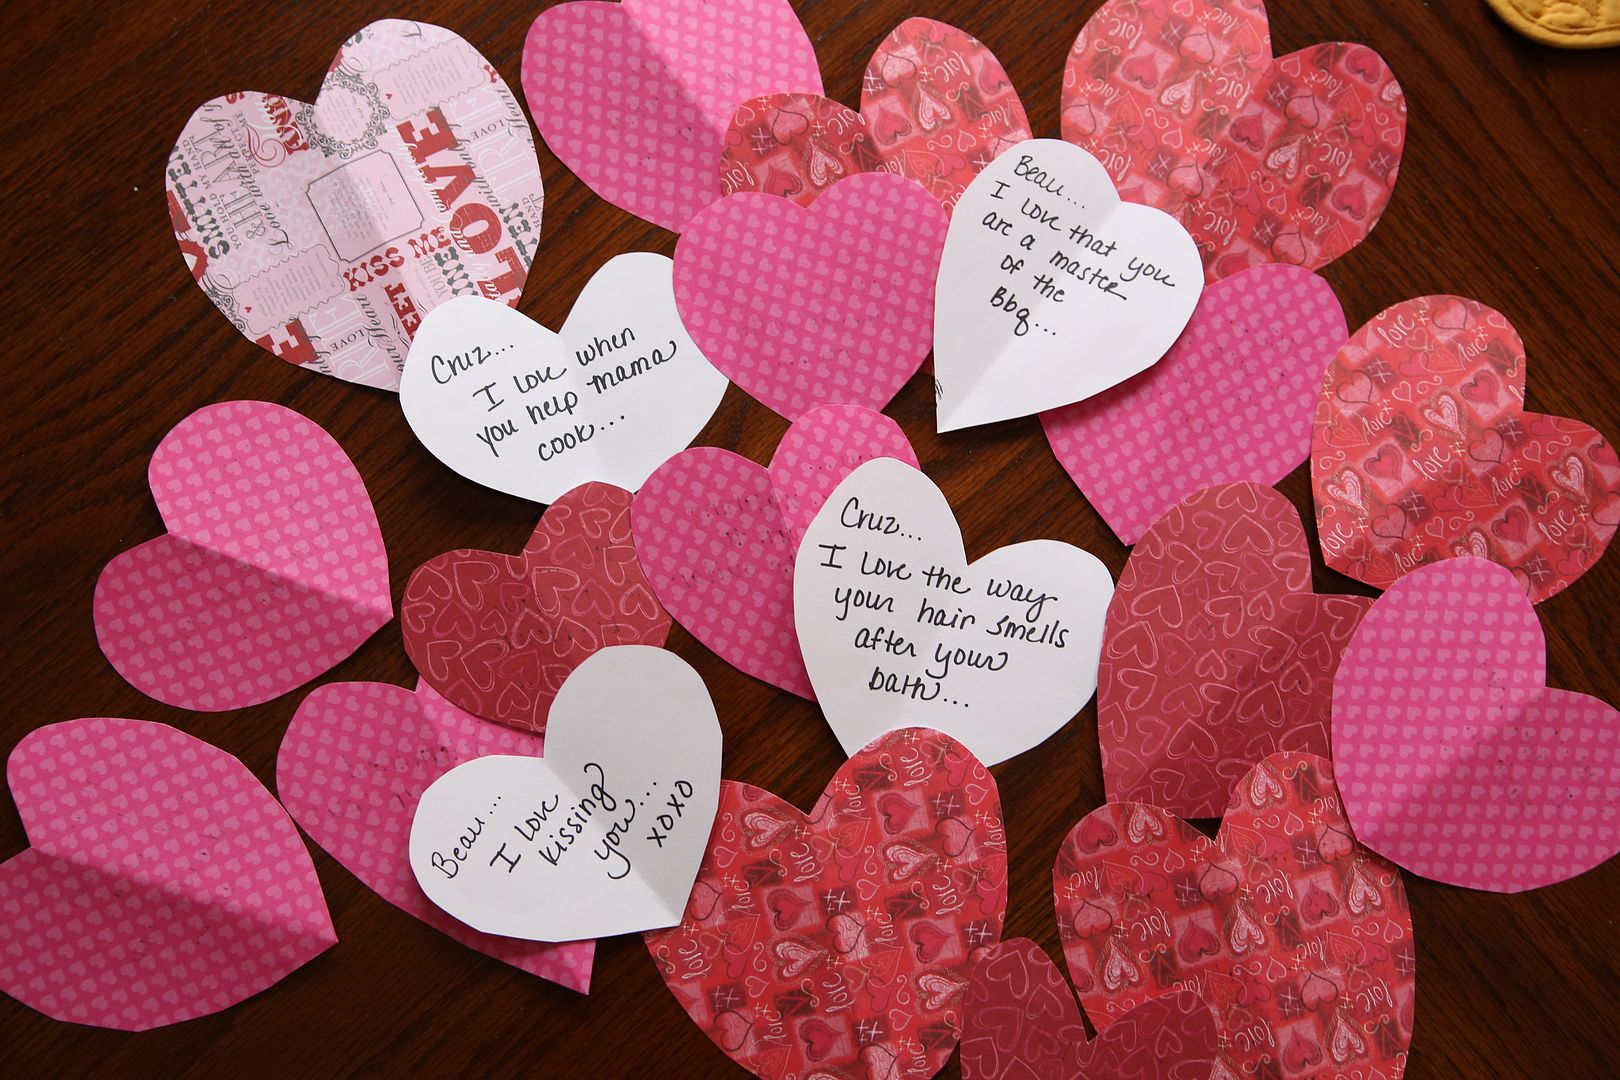
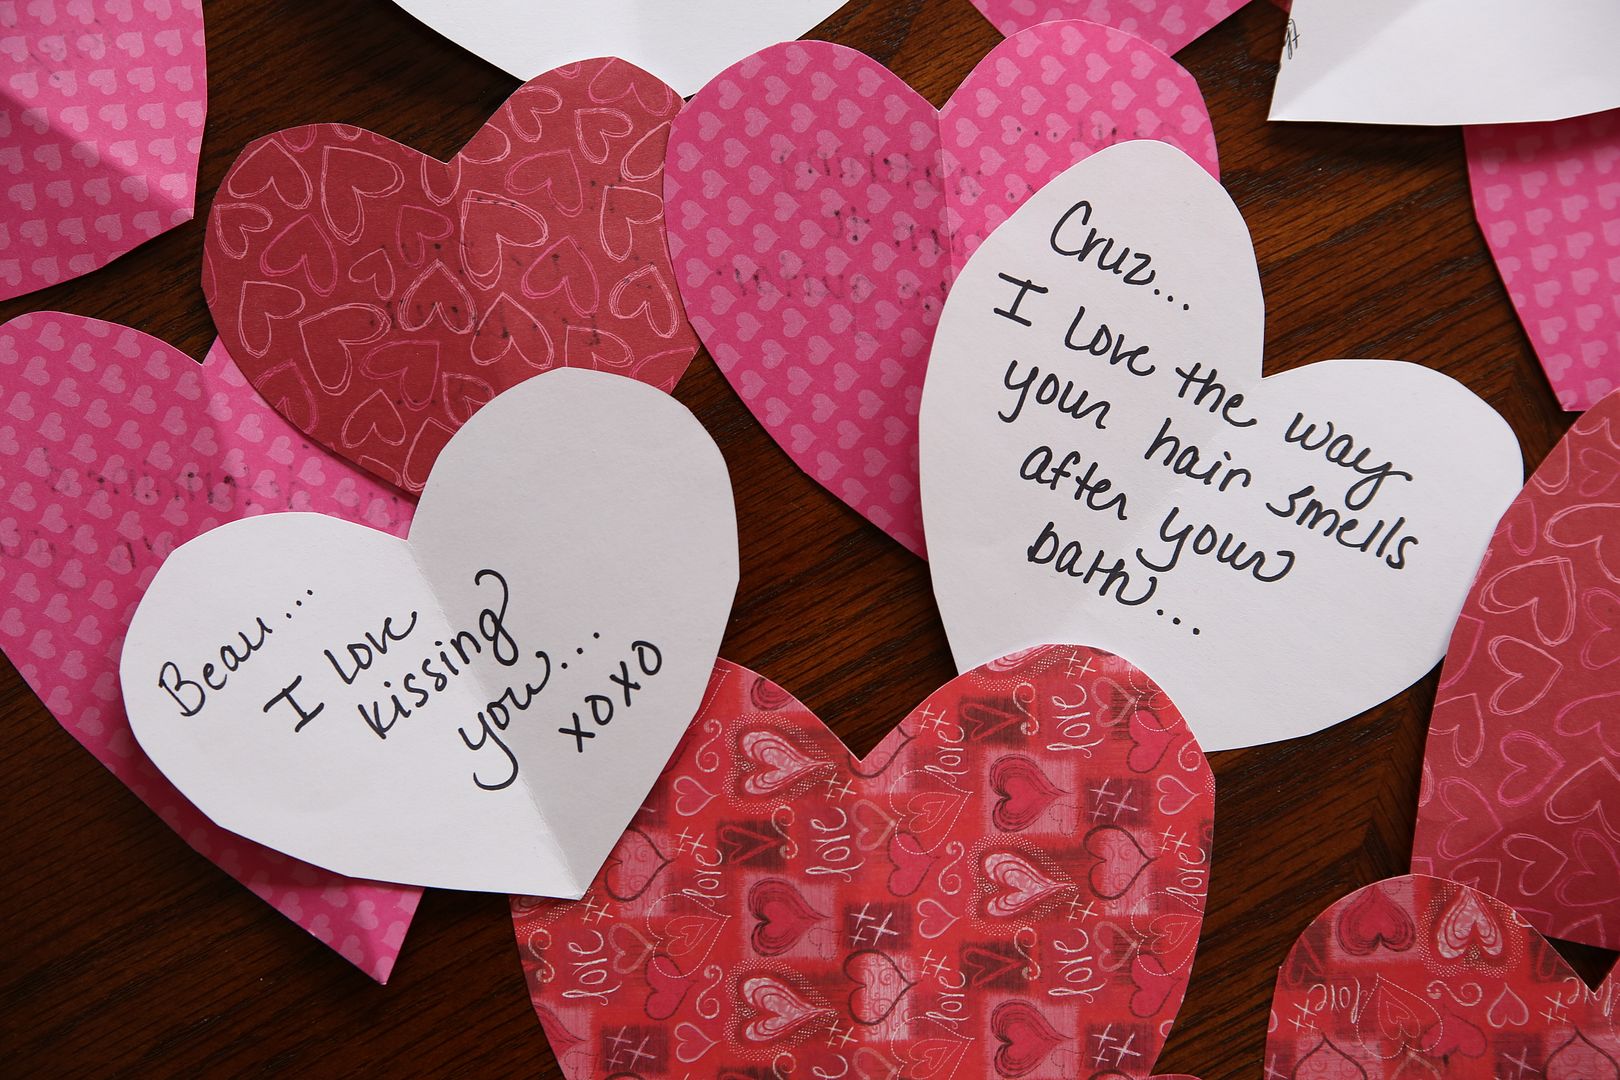
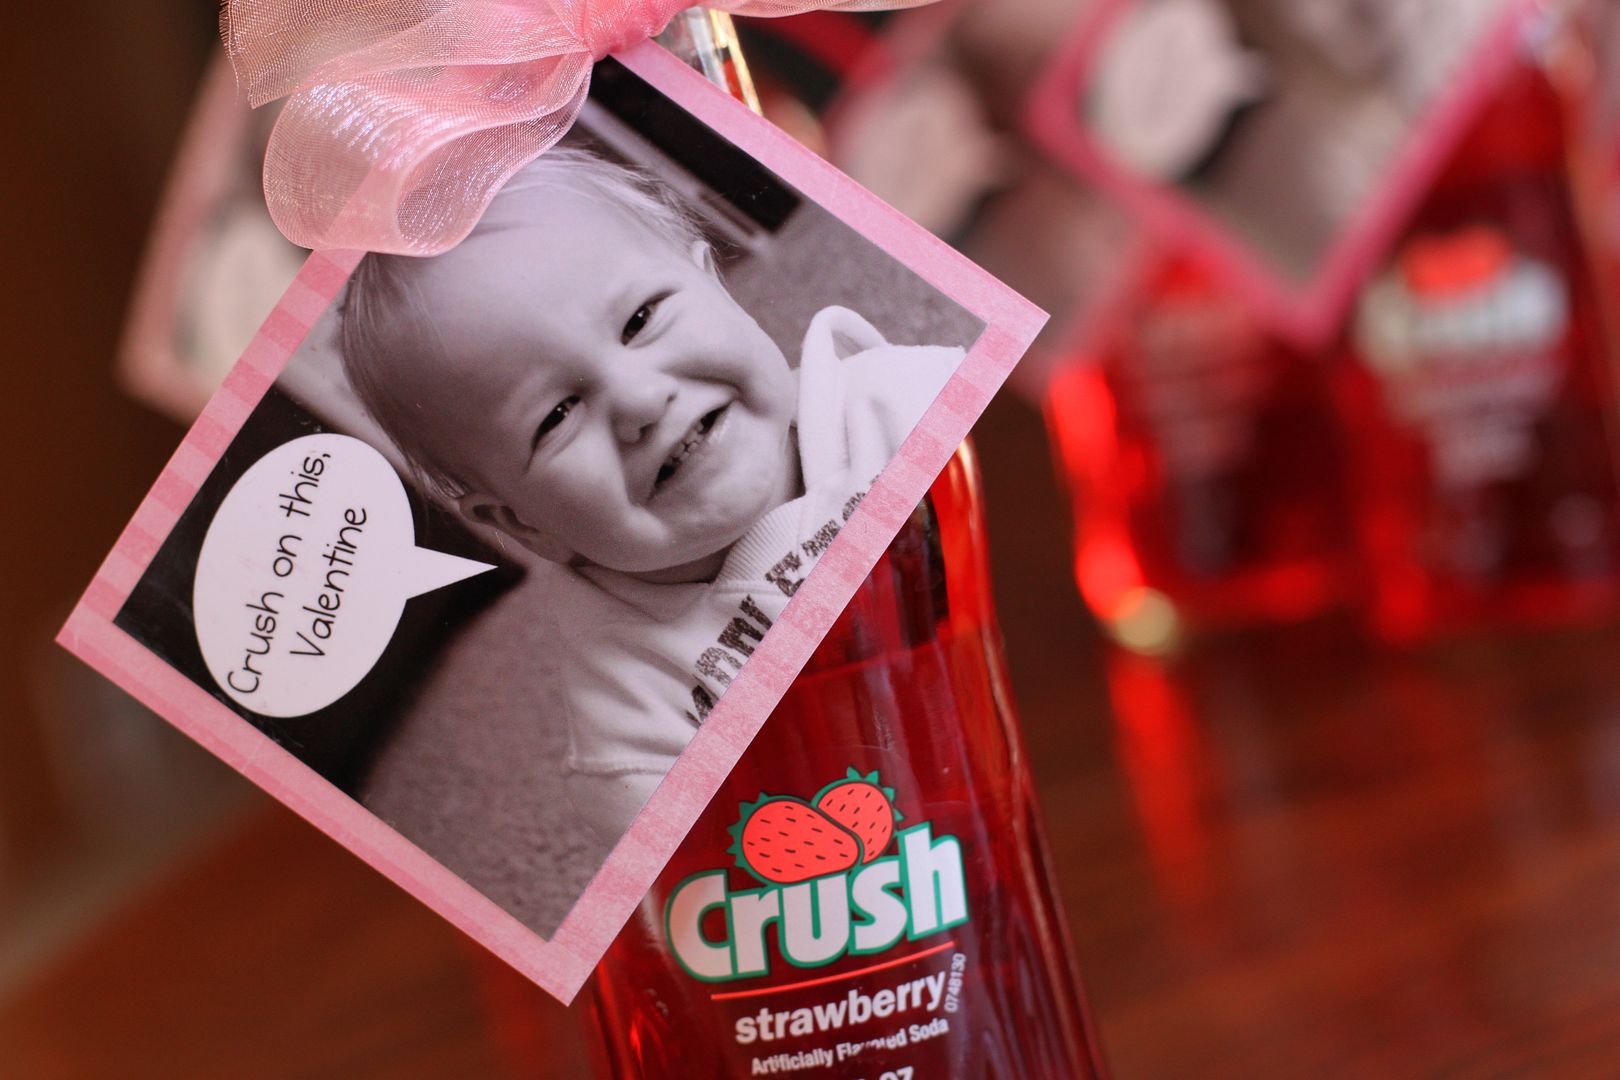
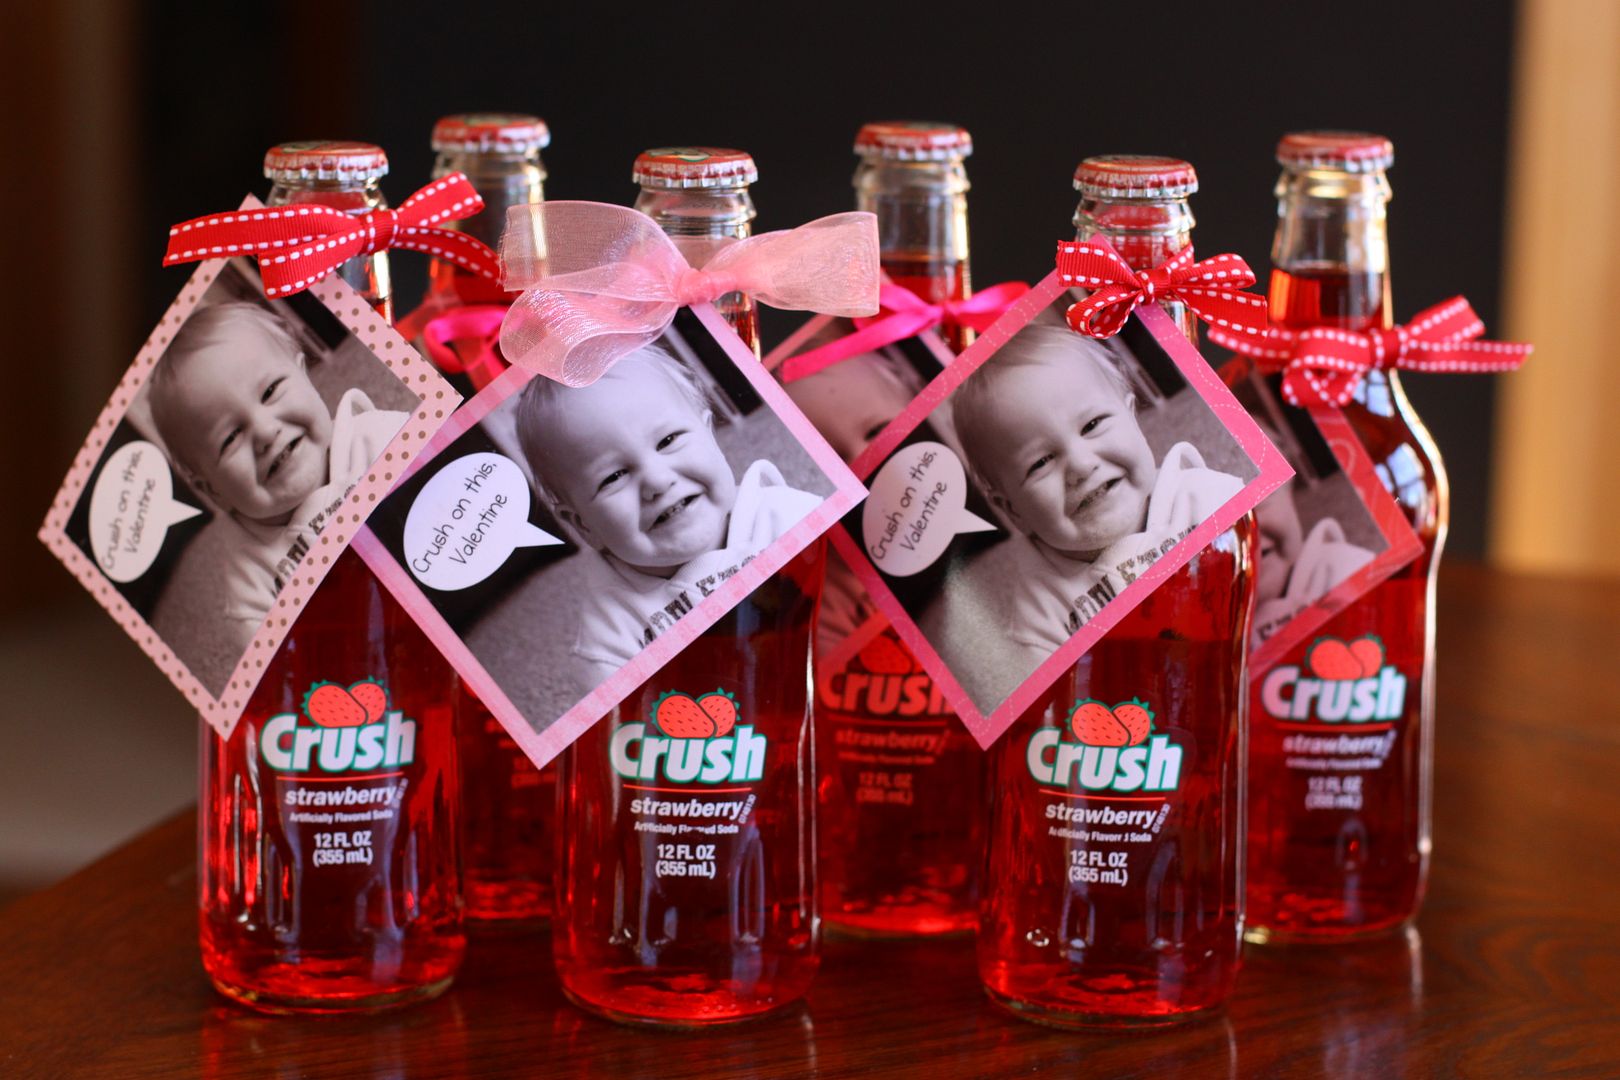
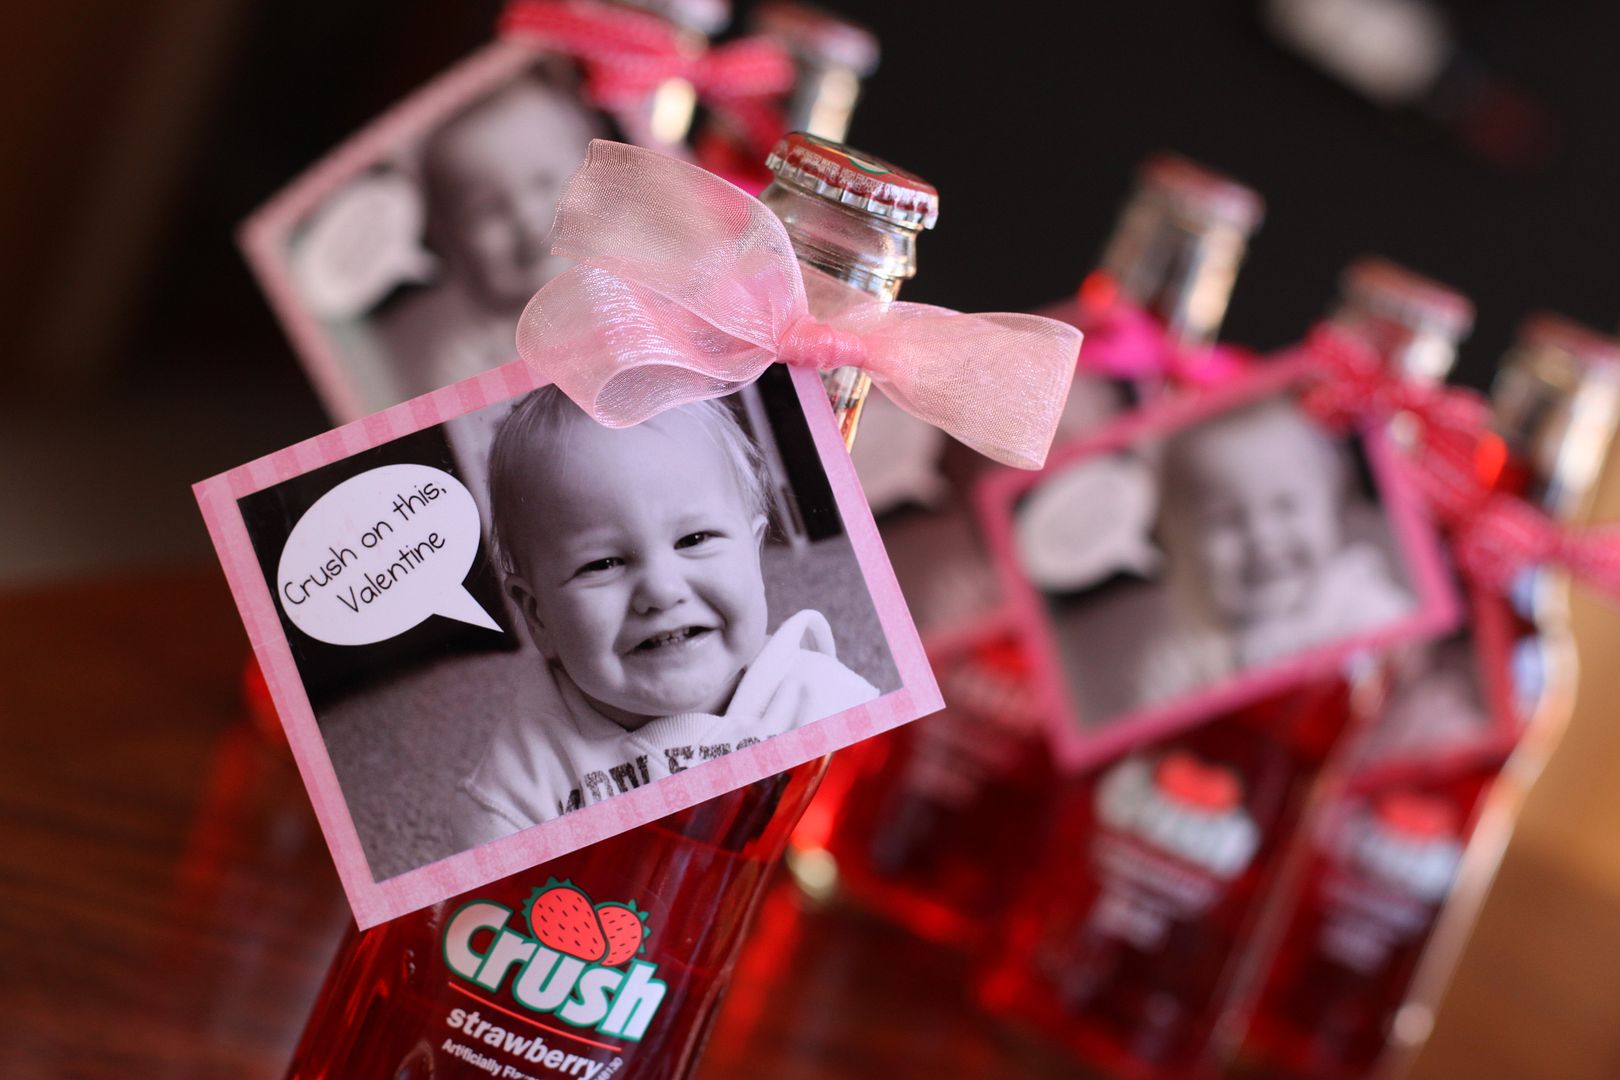
Year One // "Crush On This, Valentine."  We gave these to Cruz's 'teachers' at daycare.  He had only been at daycare for a month or so and those sweet girls became pretty important to us.   


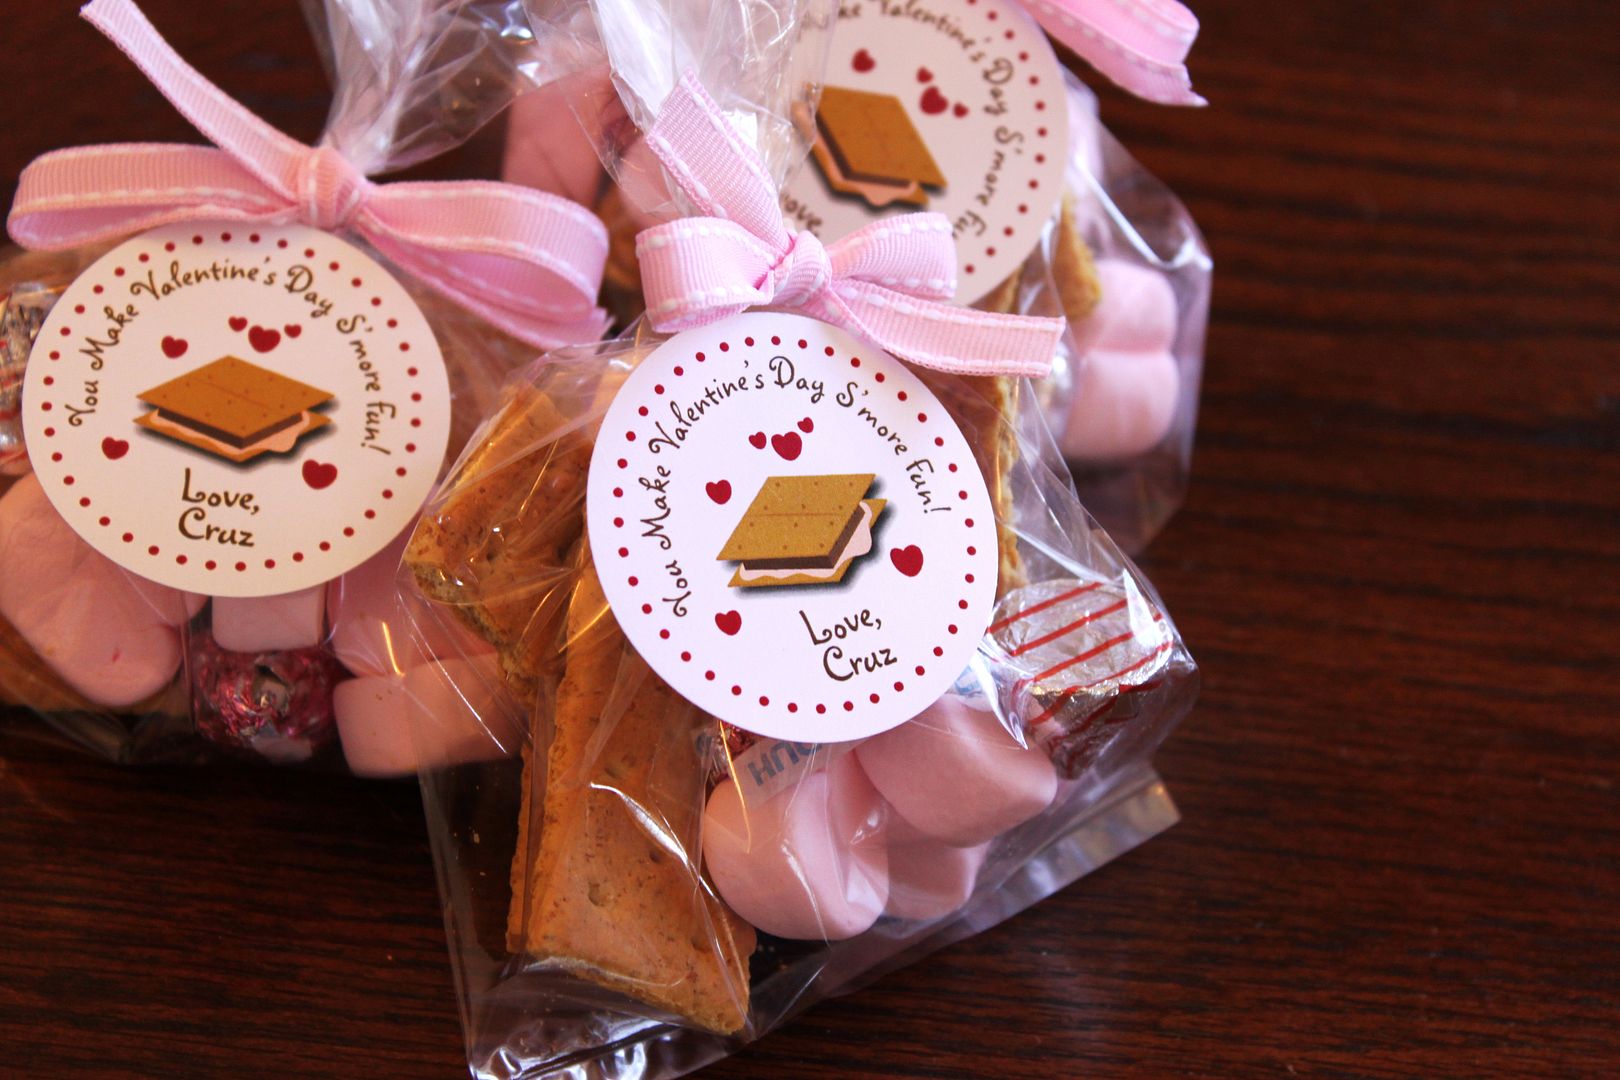
Year Two // "You Make Valentine's Day S'more Fun."  Because who can resist those pink heart marshmallows on the shelves every year.  


Year Three // "You Color My World, Valentine."  Probably one of my favorite DIYs ever.  They're like snowflakes - every single one looks a little bit different.     
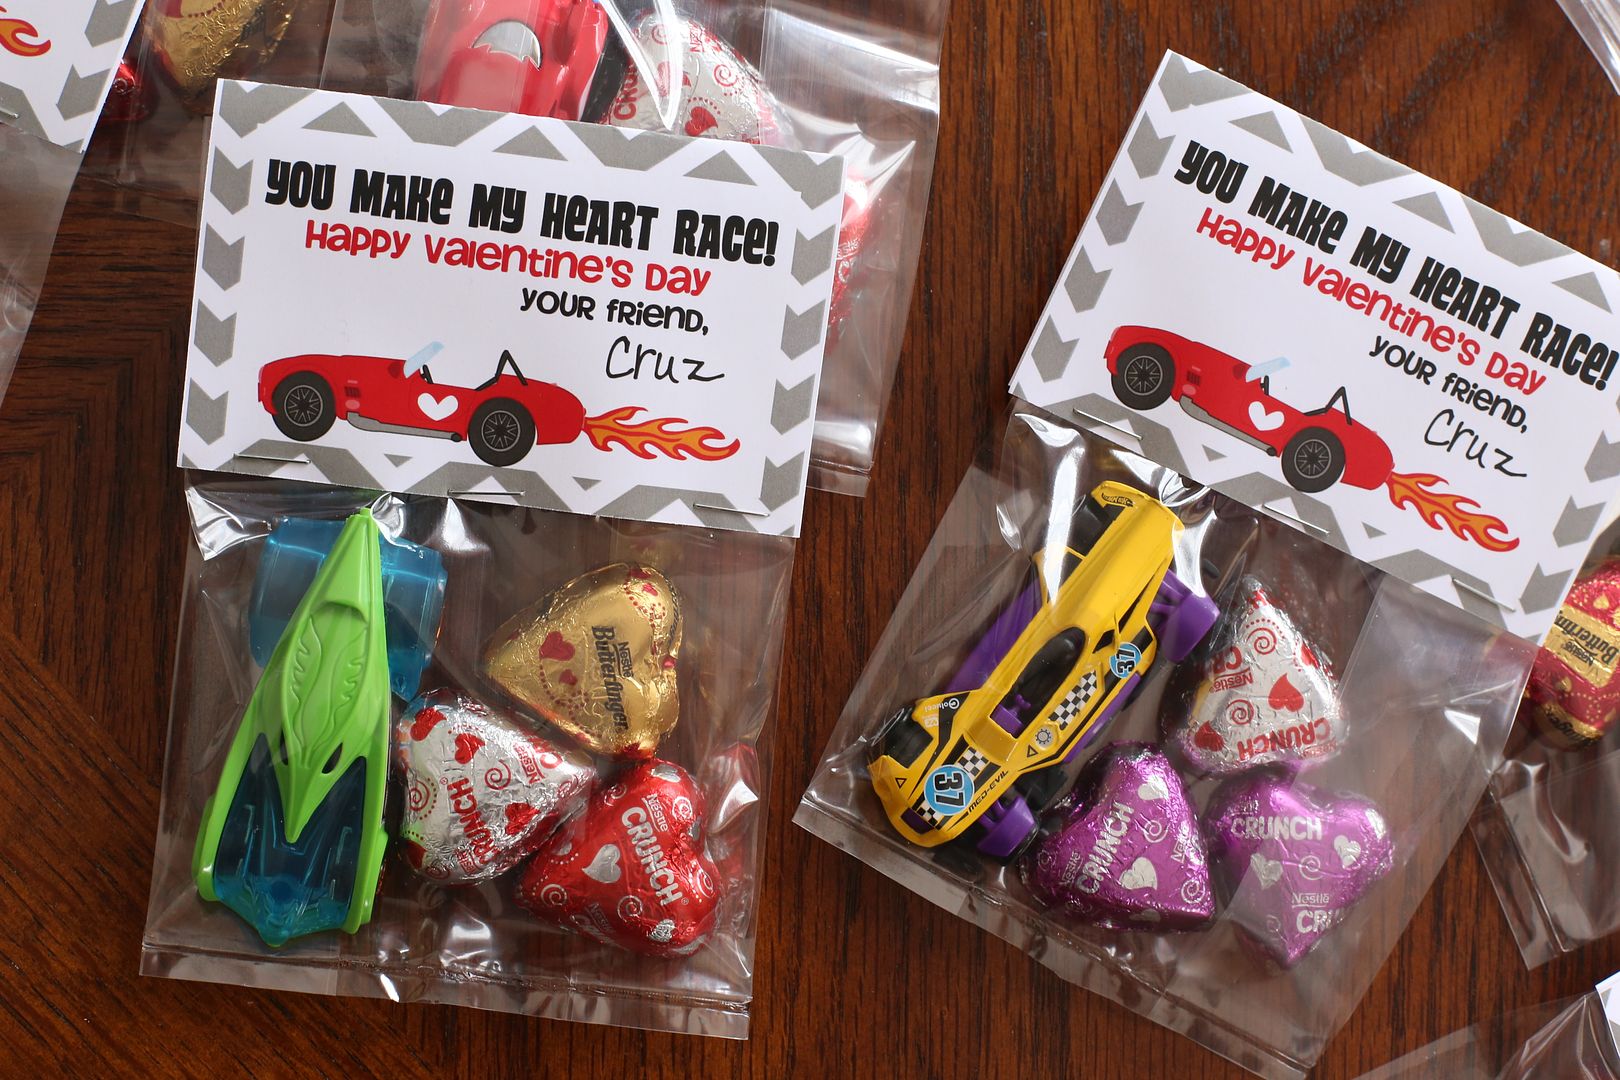
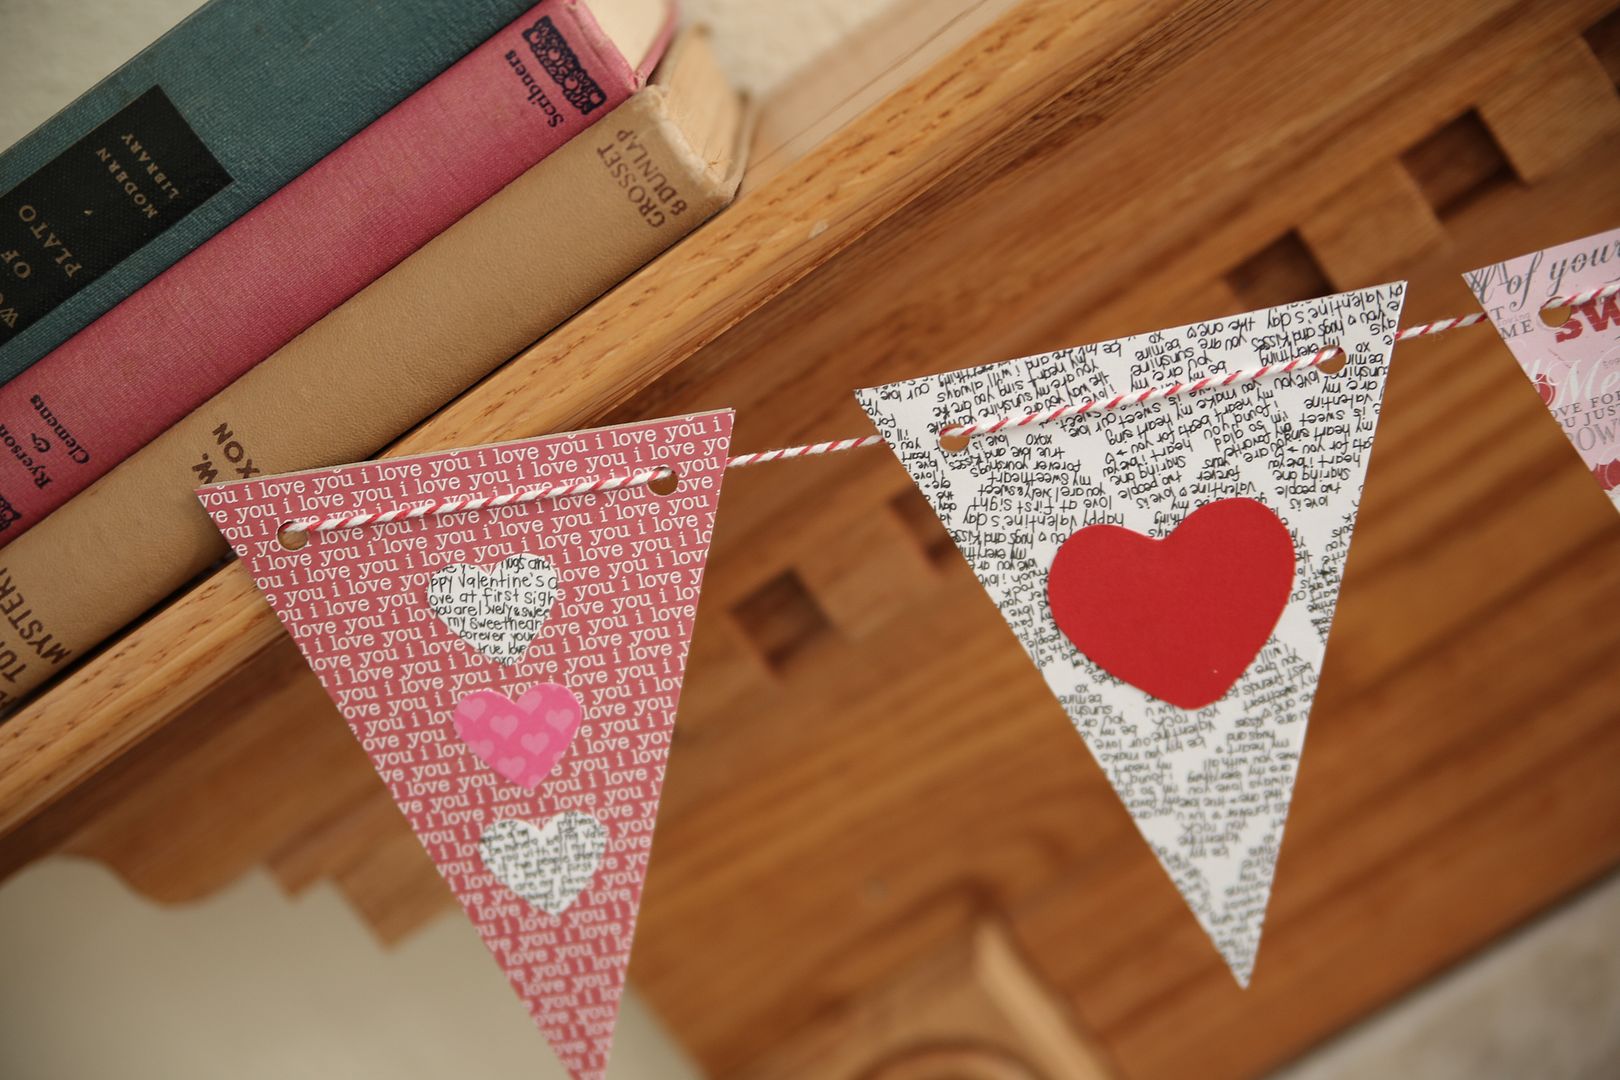
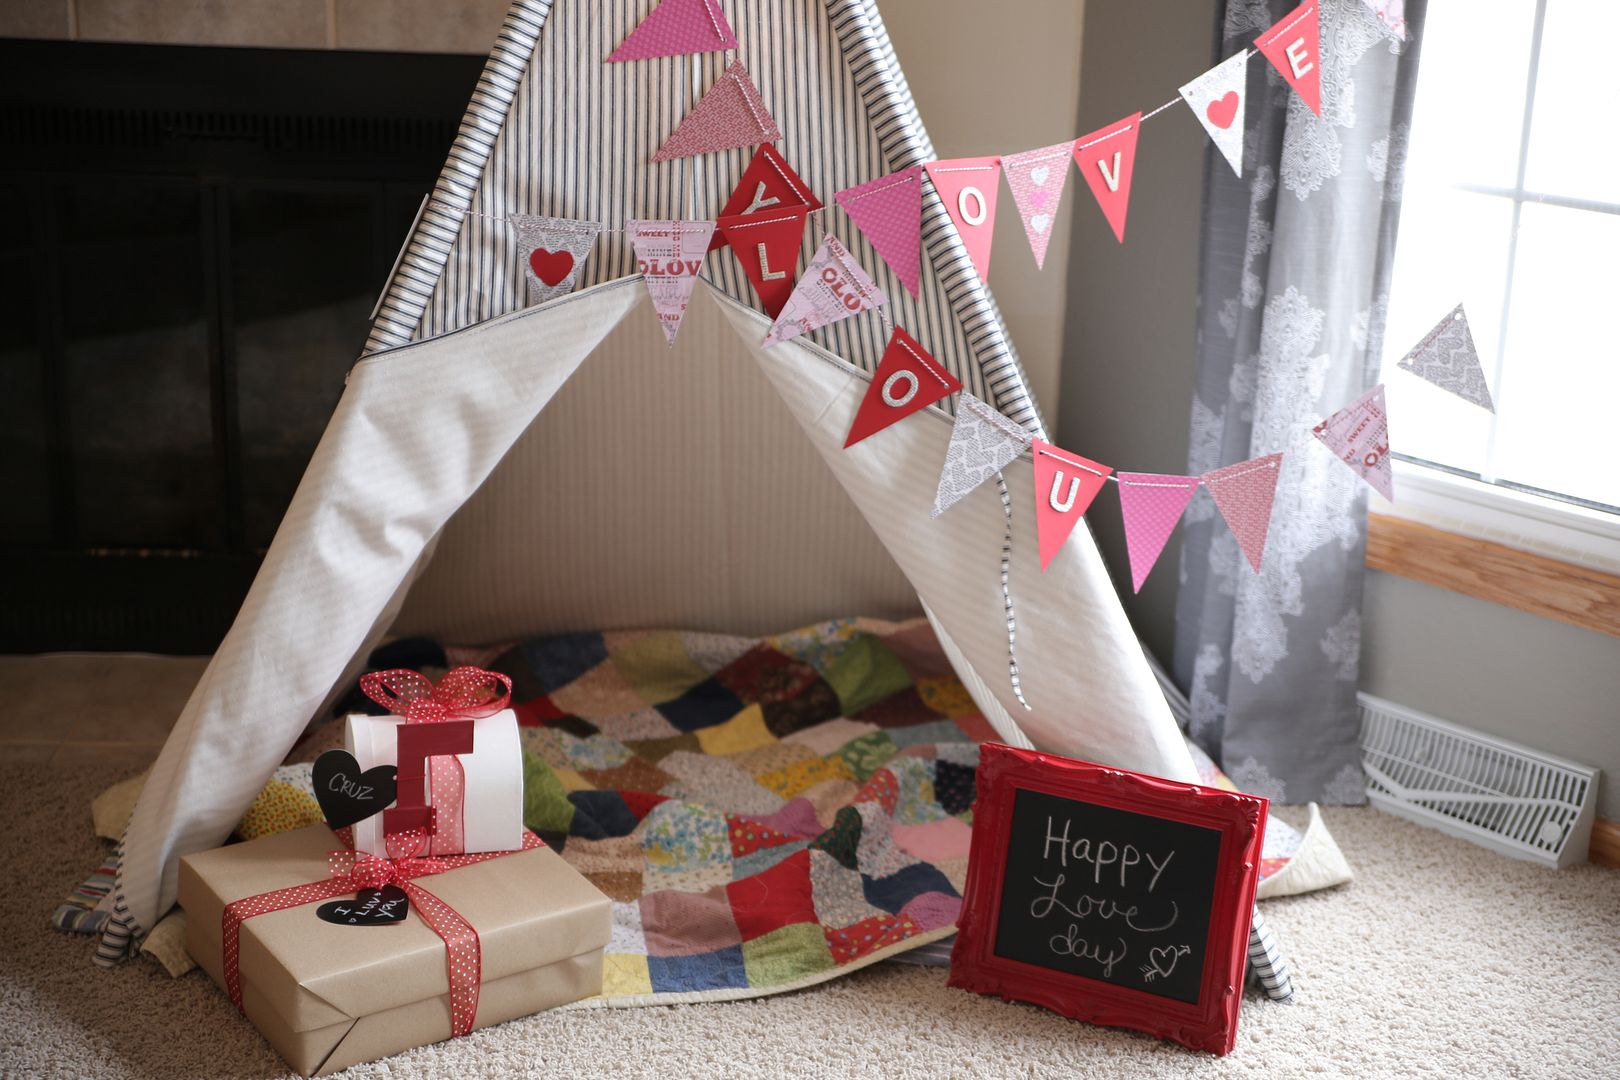

And this year...


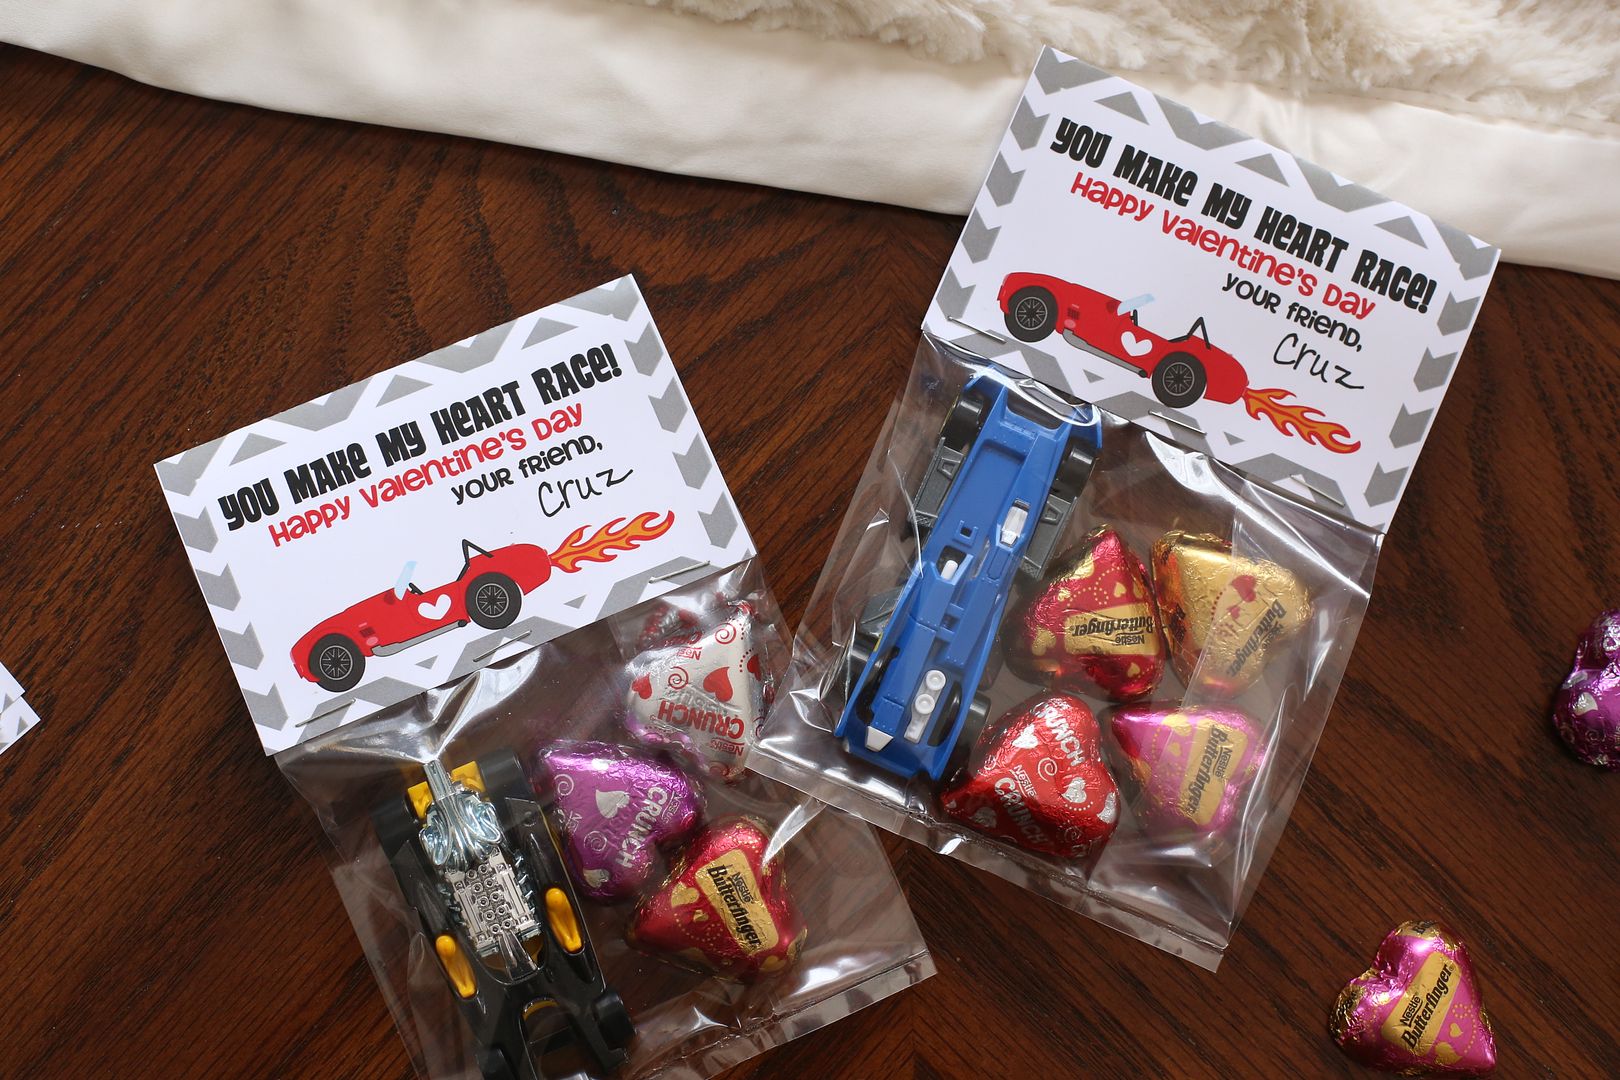
Cruz's has obtained quite the collection of Hot Wheels as of late and with a small class at daycare this year, I thought this was a perfect way for Cruz to 'share' one of his favorite things with his friends.  He had fun filling the cellophane bags with a few candy hearts and picking out the perfect race car for each of his friends.  I love how they turned out and just know he's going to have so much fun giving them to his classmates tomorrow. 


Wednesday, March 27, 2013

eggs and such


Is Easter sneaking up on anyone else this week?  I think with a mixture of it still being March, a late spring break week, and the snow that's still lingering on the ground, my seasonal clock is off due to a lack of fresh air and fifty degree weather.  We're forcing bits of spring into this house in any way we can, though, and I think mother nature is responding appropriately.  The warm temps. out there today?  You can thank my red spring coat, summer shandy for dinner, and the three dozen pastel eggs sitting in my fridge.

This weekend, we baked.  We filled plastic eggs with chocolate whoppers, jelly beans, and reese's bunnies.  We dyed Easter eggs.  We congregated around a table of sweets, laughed at babies, ordered pizza and watched the NCAA tournament.  I pretended I was Martha Stewart and arranged speckled eggs in my new basket just so and snapped pictures that show off the colors of spring.  Pink doesn't make its way into my house very often and when it does, I make sure it's captured.


This year, I had some fun experimenting with naturally dyed Easter eggs.  For the past couple of years, I've had fun seeing the brightly colored eggs from my boxed dye kits; however, this year, I was going for a new look.  After reading this article from Better Homes and Gardens, I tried a few colors using simple kitchen ingredients and was impressed with the results.


I used a cup of really strong coffee for the brown, tumeric for the bright yellow, paprika for a faint burnt orange, a hunk of red cabbage for the robin's egg blue, and beets for the pink.  I let most of them sit overnight, but grew impatient with a few.  I love the organic look of the colors and the muted shades of spring.  Very Martha!

To do this, I lined up several plastic cups on the counter top.  I started with the coffee, pouring a cup of strong, hot coffee into the cup and adding a tbsp. or so of white, distilled vinegar.  I plopped a couple of eggs into the cup and let them sit for a couple of hours, turning them every so often for an even coat (or because I couldn't resist a peek).  

Next, I boiled one cup of water at a time to mix with my other ingredients.  For the bright yellow eggs, I added 2 tbsp. of tumeric and 1 tbsp. of vinegar to a cup of boiling water and stirred to dissolve the spice.  I added a couple of eggs and saw color almost immediately.  I got the best color from the tumeric and removed the eggs after only a half hour or so.

The robin's egg blue ended up being my favorite shade of egg.  These were a little more time consuming.  I added a third of a chunk of red cabbage (cut up into pieces) to three cups of boiling water.  I turned the heat off and let the cabbage water cool to room temperature before adding three tbsp. vinegar (1 tbsp. for every cup was go-to).  Then, with a slotted spoon, I removed the cabbage and added my eggs.  I let these babies sit overnight and couldn't believe the results when I woke up!

I did the pink eggs similarly, adding a couple of chopped beets to three cups boiling water, and three tbsp. of vinegar after cooling it to room temperature.  

The finished product...


Sunday, we had the family over to play with more egg creations.  We used food coloring to get some of the deep shades of blue and green, used yellow and orange acrylic paint and sharpie markers for the baby chick eggs, and speckled a few of my natural dyed eggs with a toothbrush in paint.  Just dip your toothbrush in the paint, hold it about four inches from the egg, and run your finger over the bristles to 'spray' the egg.  The speckled eggs are my absolute favorite - they look like little robin's eggs in my basket.  
 

For sweets, I baked up these carrot cake cupcake nests from Pinterest, this absolutely addicting bunny bait sweet popcorn mix, and Kelli made these peanut butter cookies that I think Cruz would have liked to eat the entire batch.  We topped our spread with my mom's fresh strawberry pie.  It sure made for a pretty table.


I hope everyone has a wonderful Easter weekend.  I'm looking forward to visiting the baby chicks in Hampton, getting Cruz dressed up for church on Sunday, and seeing how his egg hunt strategies have changed from last year.  Spring is here and we have so much to be thankful for.               

Thursday, February 14, 2013

14 Days of DIY Love: Handmade Hearts


Happy Valentine’s Day, everyone!  I’ve sure had fun sharing my 14 Days of DIY Love with you and want to thank all of you who shared your own ideas with me this month.  February can get so long sometimes, and it's fun to create something fun to look forward to.  And just like that, we're halfway through the month!

I had a little fun with this last project of mine before I left to catch my plane to New Orleans this morning.  Yes, I'm leaving my boys on Valentine's Day, and wanted to make sure they were well aware that my heart is with them even if I won't be for a few days!  After Beau left for work this morning, I snuck around the house and distributed 20 handmade hearts with messages of 20 reasons I love my boys.  10 for Cruz and 10 for Beau, all dispersed around the house for them to discover throughout the time I'm gone.  They'll find hearts taped to the bathroom mirror, hid under Beau's guitar case, or stuck ever so casually in Cruz's Cars DVD.  Tiny little reminders of why I love them so much, as well as a fun little scavenger hunt for Beau to play with Cruz when the nights may get a little longer without Mom around.  Either way, I can't wait to hear their reaction as they discover all of the pieces of my heart I left at home.

  
Happy Valentine's Day, sweeties, and stay tuned for a piece later today just for you.

Photobucket 

Thursday, February 7, 2013

14 Days of DIY Love: The Chalkboard Frame


I've loved chalkboard paint for quite some time, and have found it necessary to have a quart or so on hand at all times in case I have the itch to add another blank canvas to our life.  I've painted entire walls and herb plants for our deck, and most recently made a couple fun framed boards for magnets and doodles.  And now that chalkboard paint comes in spray form, you can whip one of these up in a matter of minutes.

   
DIY Magnet/Chalk Board:


Supplies:

-frames - I found both of my frames at Hobby Lobby, and waited until the 50% off sale to get them half off.  One was open back, so I bought a piece of foam board to go behind it, and the other came with backing 
-spray paint for frames
-a piece of tin (if you want a magnet board) cut to be the same size as the glass.  My dad took care of this for me at his shop, but I know sheet metal can be purchased at a home improvement store (and likely cut there, too).  If you don't want a magnet board, paint the glass instead.
-chalkboard spray paint or brush paint, whichever you desire
-frame backing and hangers  (if you purchase an open back frame and plan to hang it on the wall) 

I spray painted my frames, then spray painted my tin with chalkboard paint.  Let dry for 24 hours before assembling.  We hung Cruz's chalkboard frame in his room at his level, and filled a plastic bin with letter magnets from Wal-Mart and these foam object magnets from Amazon that I just couldn't resist.


My little chalkboard frame makes a super fun photo prop for photo shoots like this one, or this one, and is small enough to fit on a lap for easy and accessible doodling.  The small ones would also add great contrast to a photo collage on the wall.  You could add daily quotes, reminders, or messages for your loves.


By the way, did anyone else see these adorable chalkboard chocolates at Target?!  I wish I would have bought two!

 
Photobucket 

Wednesday, February 6, 2013

14 Days of DIY Love: Have You Played with Chipboard?


I realize I may be late to the game on this one, but I did my first project with chipboard a couple of weeks ago and have been back to Hobby Lobby three times since dreaming up new projects and possibilities with this thick paper product.  If you aren't familiar with chipboard, it's basically a heavy card stock made from recycled paper.  It's typically seen in big sheets of paper, but most recently, Hobby Lobby, Joann's, and other craft stores now carry aisle-fulls of chipboard in all different shapes, sizes, and products.  I've seen many people experiment with the chipboard letters, and just had to try out a banner using these pre-cut chipboard pennants.

Here's what you need for your own pre-cut chipboard banner:

-Chipboard pennant banners.  These can be found in many sizes at your local craft store.  I found mine at Hobby Lobby in the aisle with the burlap and wooden stamps.
-Scrapbook paper - in whatever colors and designs your heart desires.
-Other bling for your pennants - I couldn't resist these chipboard letters that look like they were carved from the pages of a love story.  They were in a similar package to these, and in the same aisle as the chipboard.
-Scissors, glue, hole punch, ribbon


Just use the chipboard as your stencil and cut out matching sized pennants with your scrapbook paper.  Stick on with some glue, embellish with your designs, and re-punch your holes on each side of your pennant.  String some ribbon through and hang on your mantle, your window ledge, or your teepee ;)


More to come on this teepee later this week :).  

 
Photobucket 

Tuesday, February 5, 2013

14 Days of DIY Love - Crush on this, Valentine


I can't wait to share one of my favorite Valentine gifts I made for Cruz's teachers at daycare last year.  It was simple, easy, and so so cute.  The only problem was finding enough glass bottles of Strawberry Crush.  I looked everywhere and finally sweet talked the beverage guy at our local grocery store into ordering me a few more six-packs!

  
Strawberry Crush Valentine's...

1.  Edit a picture.  Find a sweet and goofy picture of your little and use a photo editing site to make a speech bubble on the picture itself.  I used Photoshop Elements, but I'm pretty sure Photobucket, Piknik, and Picasa are have the capability (and are all FREE!)

2.  I saved the image as a jpeg and printed several in wallet size from Wal-Mart.  Punched them out, glued them to a piece of card stock, and cut around the edges to give them a little frame.  

3.  Punched a hold through the picture and used festive ribbon to tie to a bottle of Strawberry Crush.  This, with the flirty message from Cruz was the perfect gift for all of his college 'girlfriends' at daycare.   


Photobucket 


LinkWithin

Related Posts Plugin for WordPress, Blogger...