
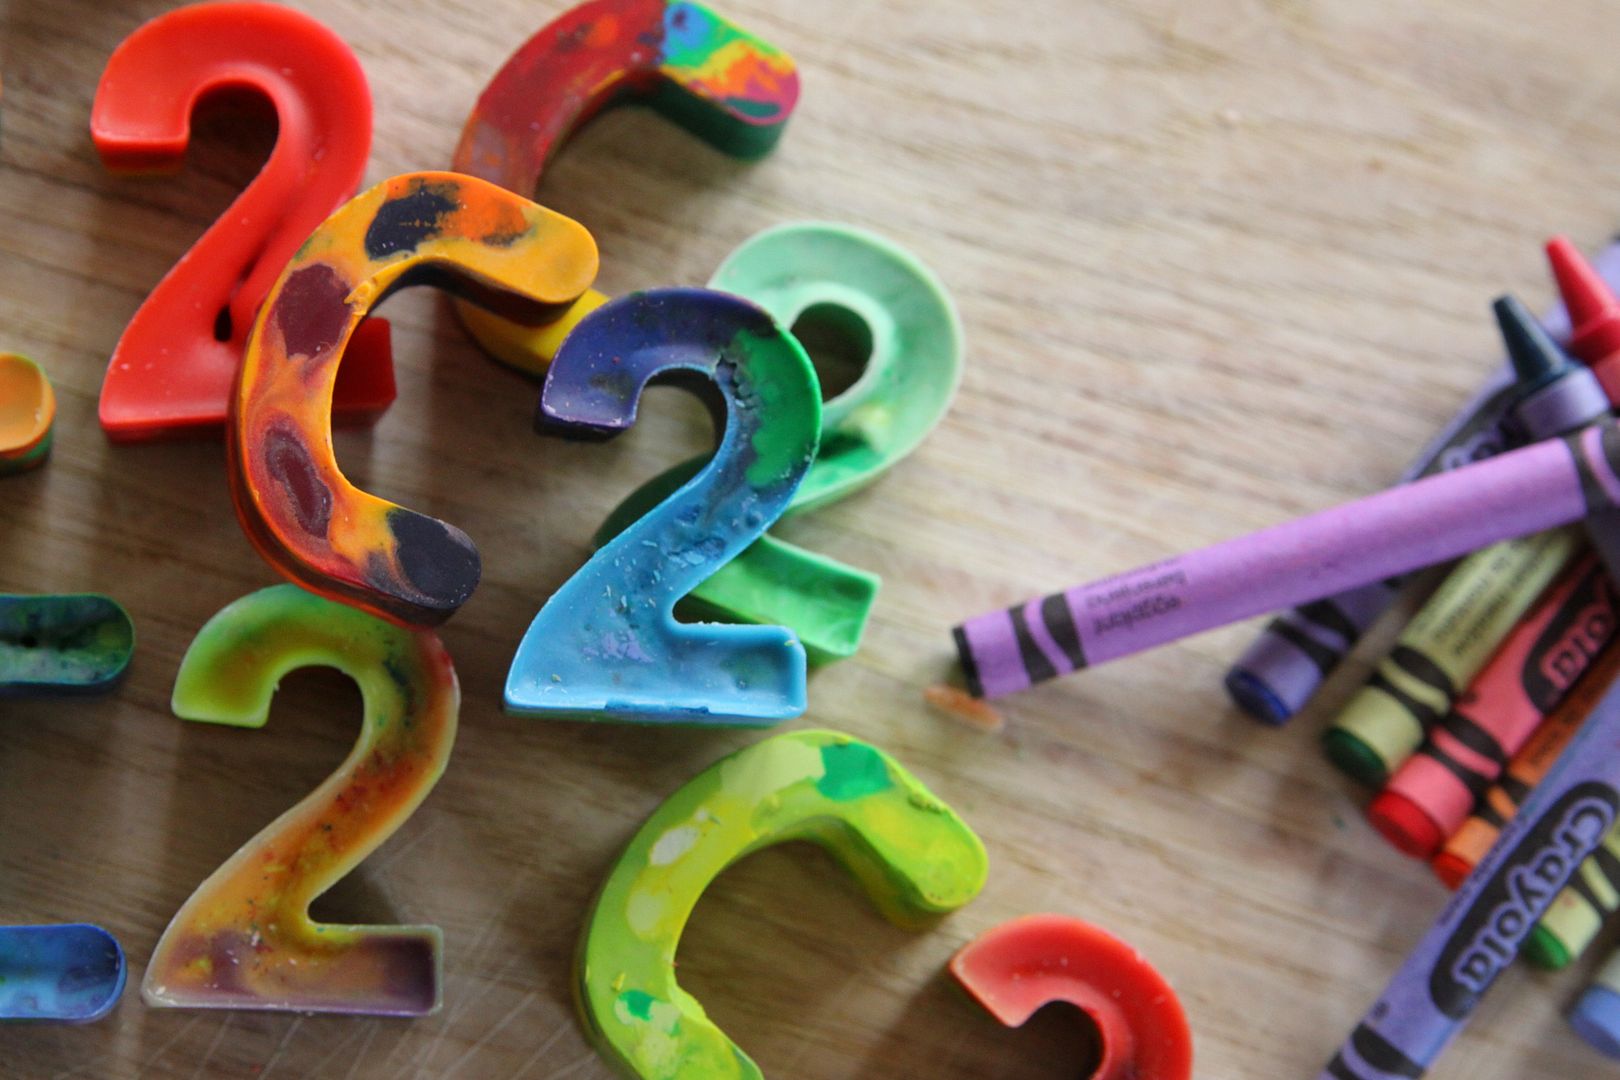
Stopping in quick on this Wednesday to share one of my favorite party details from Cruz's 2nd Birthday Bash. These 'C2' crayon molds were a best-seller at Mr. Hooper's Store, and were fitting with our letter and number of the day theme. Finally, they were the 'safe' alternative to Elmo's two favorite things. While I was tempted at first, I didn't quite know what parents would think if I sent their child home with a new goldfish pet!
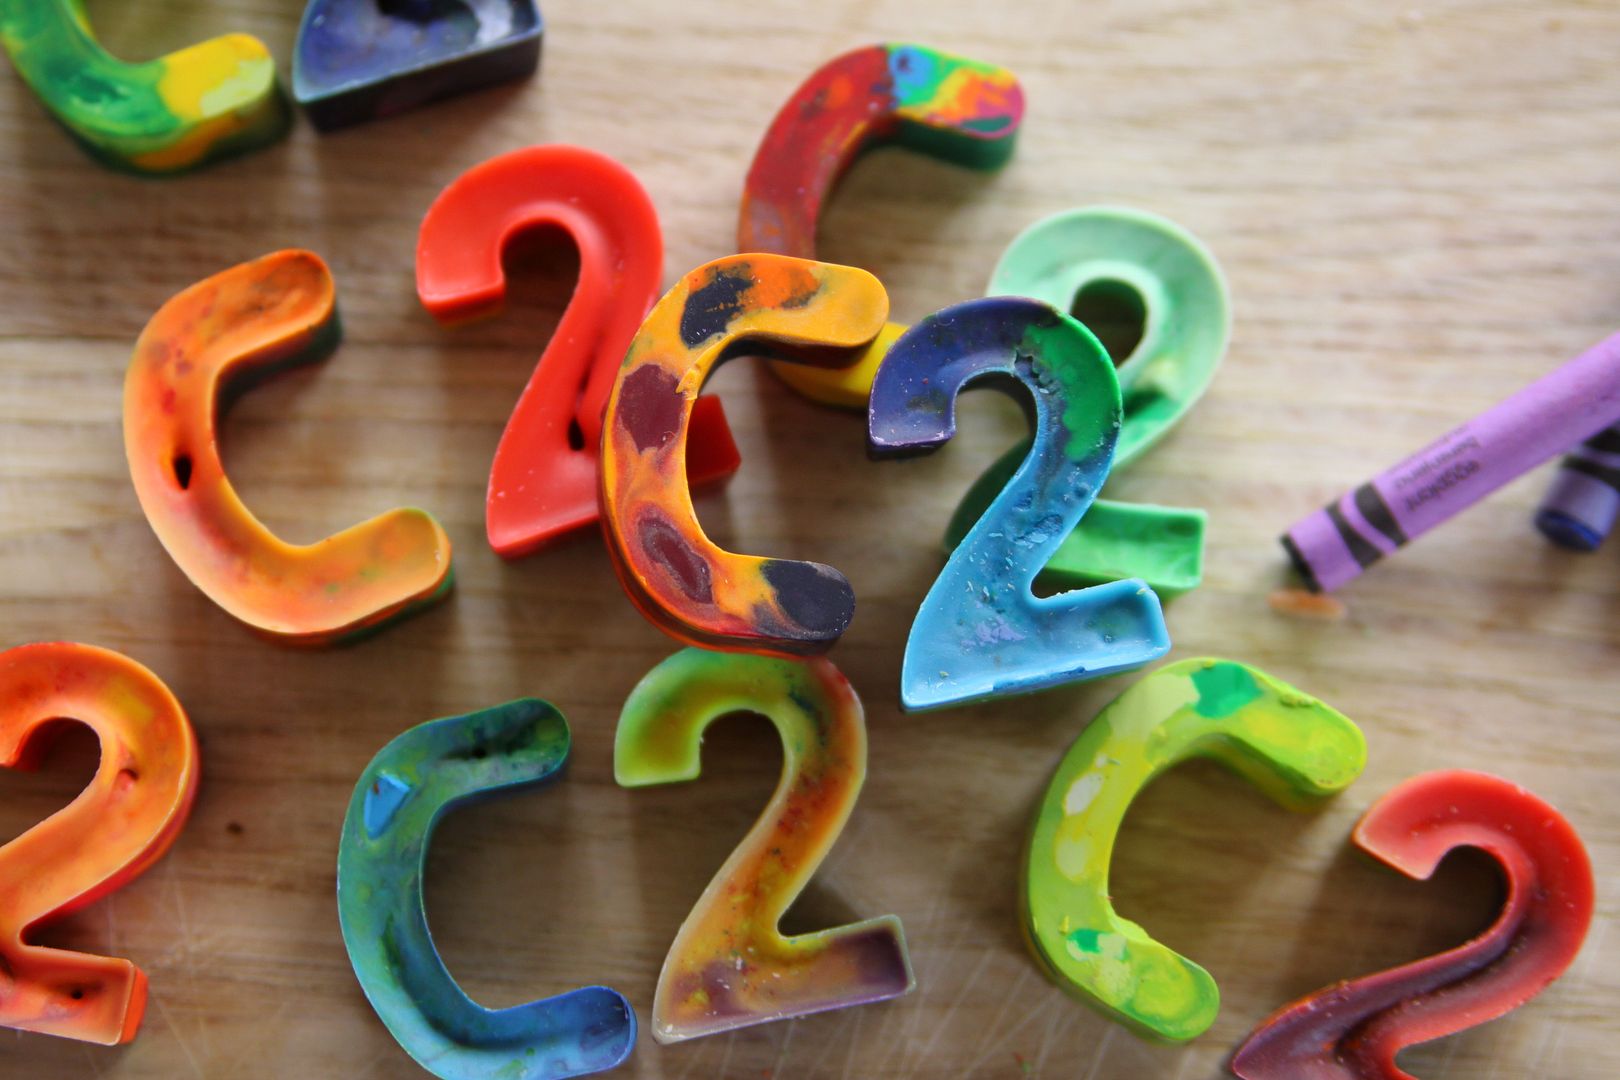
They're really quite simple to make, and make such great use out of old, broken crayons. I became quite addicted to different color combinations, and loved that every single one was unique.
DIY Crayon Molds:
-Silicone Letter Trays - I ordered these from Amazon
-Old, unused crayons - paper liners removed and cut into 1/4" pieces
-Cooling racks
1. First, prep your crayons by removing all the paper liners. We used a razor blade which made this process MUCH faster. Then, cut your crayons into small pieces, about 1/4" each. The smaller the pieces, the more variance of color you will see in your molds.
2. Next, fill your molds with crayon pieces. The crayon wax will sink as it melts, so don't be afraid to fill your molds to the very top, even heaping slightly. I did some with lots of colors, some with different shades of one color, and some pretty boring. Some tricks I found through practice? Some pieces of white crayon mixed in with your color will give you lighter shades, and an equal balance of darks and lights will give you browns.
3. Because I was only working with my 'Cs' and '2s', I decided to microwave mine and was pleased with the results. Just pop the trays in the microwave and heat for about 4 minutes. The trays are very hot, so I let them cool for a few minutes before moving them to wire racks. The key for removing the actual molds from the trays is TIME. There were a few times when I got too anxious and broke some of my favorite ones because they weren't quite ready to come out yet.
Suggestion! If you have the time, I would recommend doing your melting in the oven. Since the crayons melt slower in the oven than in the microwave, they hold their shape a little more, creating more color variance in your final product. I would bake them at 250 degrees for about 12 minutes or until melty.
Now that we have our fair share of Cs and 2s around here, I've got plans to do a complete alphabet set for Cruz Man's art nook. I also think they would make adorable gifts for daycare friends, teachers, and any art enthusiast. Google 'crayon mold trays' for lots of different shapes and ideas!
Those are super cute! I bought a few crayon molds at Ikea last year, but haven't used them yet...maybe soon!
ReplyDeletewhat a cute idea!!
ReplyDeleteandrea brionne
@thedailyeverythings.blogspot.com
Just came across your blog! Your baby boy is so adorable! Enjoying catching up and I LOVE this idea:)
ReplyDelete